These steps assume that you have already installed PDF FLY on your Windows PC and that you can access it from the Start Menu, Desktop or Quick Launch Ribbon. If you don’t have it yet, download the PDF FLY 30-day free trial.
How to Convert PDF into Editable Graphics
Total Time: 10 minutes
Select the Files to Convert
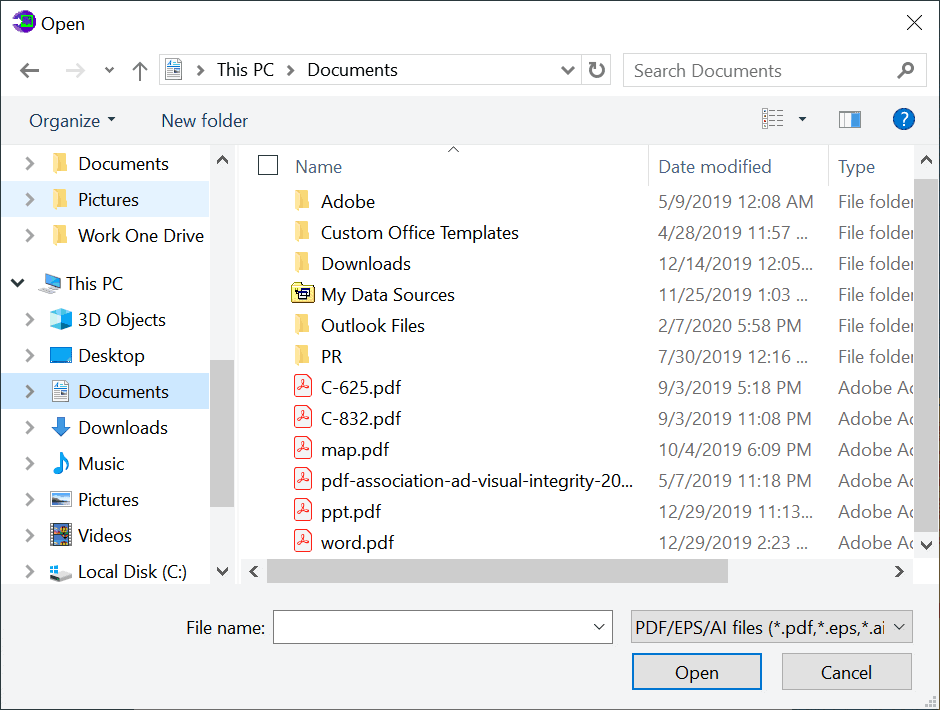
Launch PDF FLY and choose the file(s) to convert. Supported formats are PDF, EPS and AI (Adobe Illustrator). You can convert single file or multiple files. Click Add and Remove until all the files for conversion are collected.
Select the Output Format
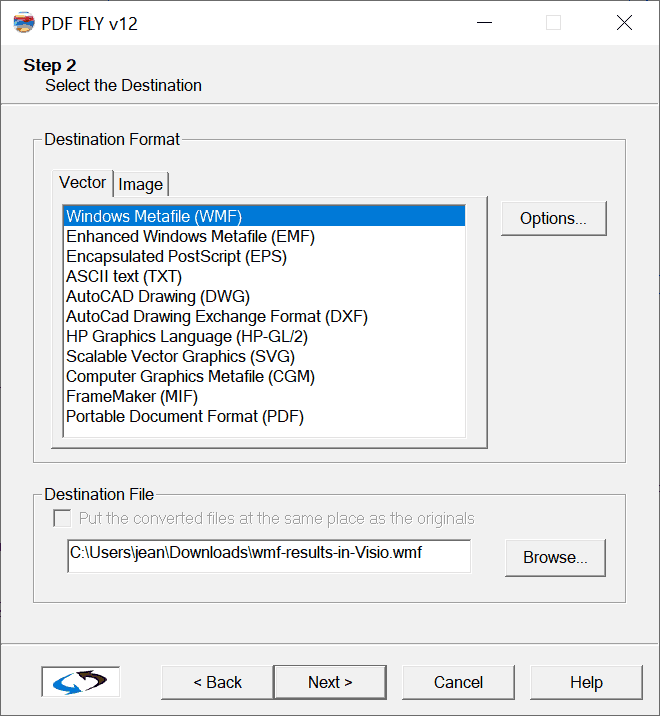
Choose Vector or Image mode using the tabs. Vector formats include WMF, EMF, EPS, TXT, DMG, DXF, HPGL, SVG, CGM.MIF and PDF. Image output formats are JPG, PNG, GIF, BMP, and TIFF.
Choose Conversion Options
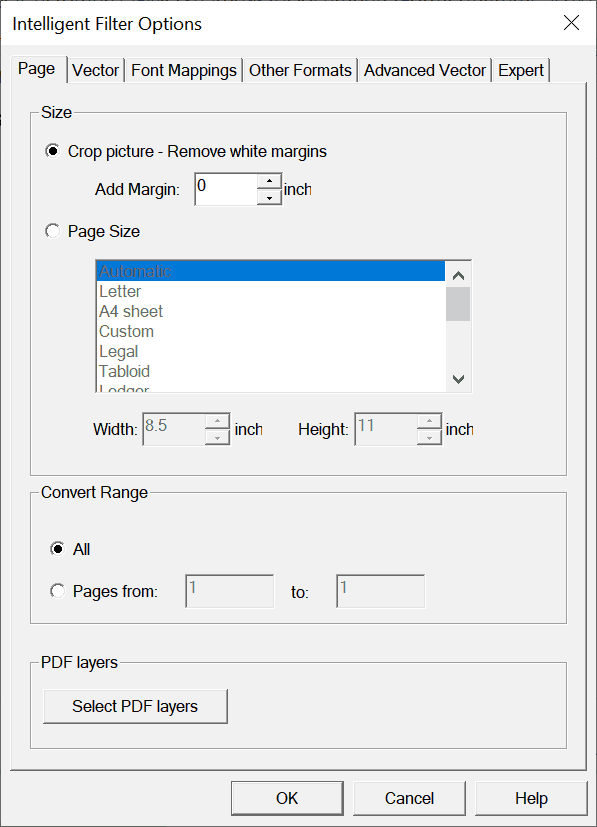
Once you select your format, click on the Options bitton to tailor your conversion. In most cases, the default options are fine. If you want to learn more about all of the options available on each tab, please review the overview of PDF Conversion Options.
Review the Conversion Summary
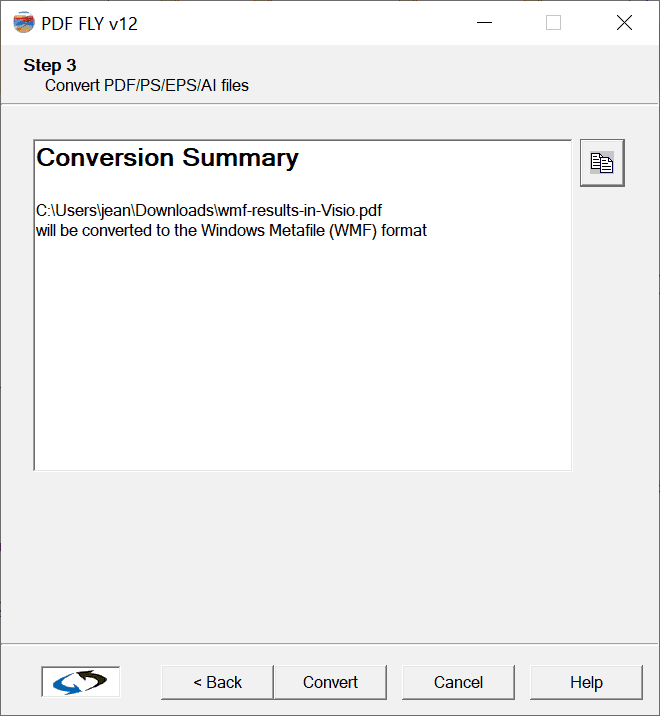
Once you have added your PDF files, chosen the output format and selected any options, you will be presented with a Conversion Summary. Here, you can chose the destination directory. By deafult, it tis the same directory as the original file.
Work with the Converted Files
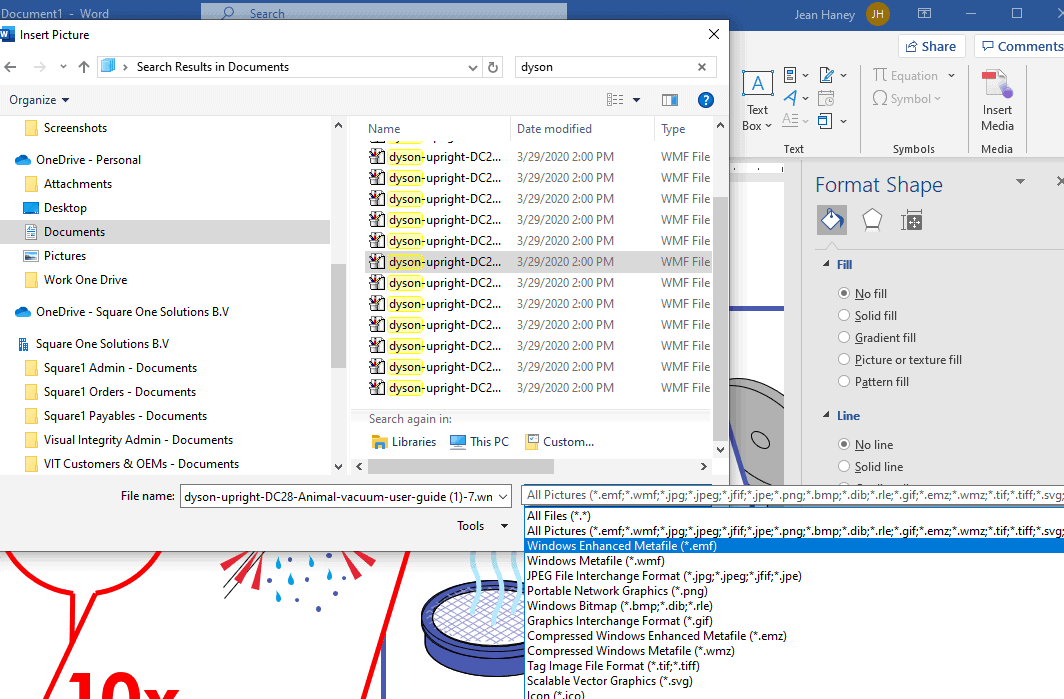
Depending on your software program, you will use Insert, Open or Import to access the file from your file system. Microsoft programs generally use “Insert Picture from File”. Most tools have a drop down menu which displays their supported formats. Once the file is displayed on screen, you may need to right-click on it and Ungroup the graphic in order to access the individual elements. Some files may have nested groups or layers so you may need to ungroup multiple times to access the objects you want to work with.
