Using pdf2picture for Windows
This pdf2picture tutorial assumes that you have already installed pdf2picture on your Windows PC and that you can access it from the Start Menu, Desktop or Quick Launch Ribbon. Choose your preferred method and launch pdf2picture. Download free pdf2picture 30-day Trial.
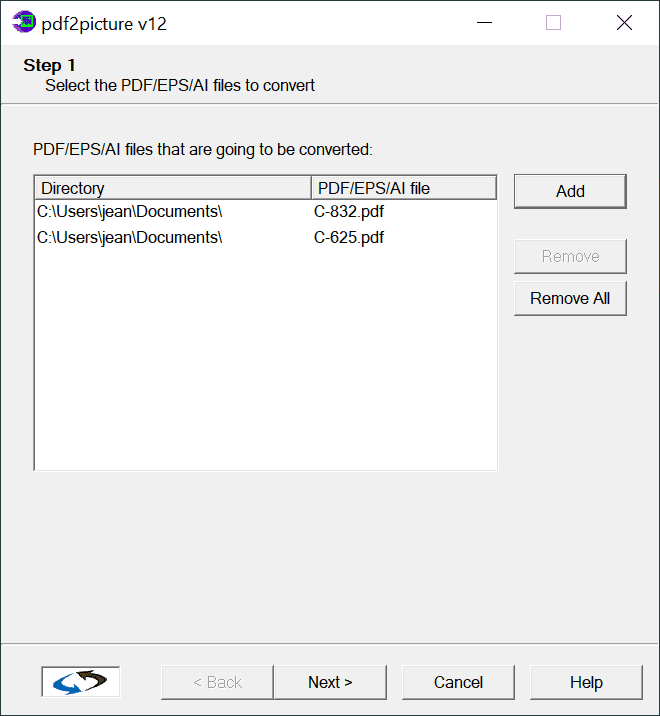
Choose the PDF files to convert
How to use pdf2picture. Select the files that you want to convert and continue to “add” and “remove” them on this screen until you have the set that you want to work with. Note that when using pdf2picture only one format conversion can be done at a time so if you want to convert a file to WMF and SVG, you will need to run pdf2pcture twice.
Select Output Format
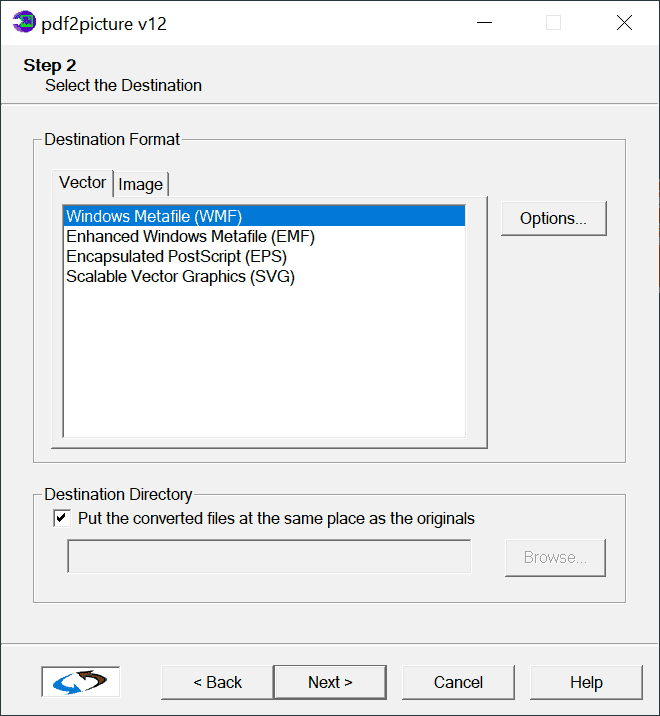
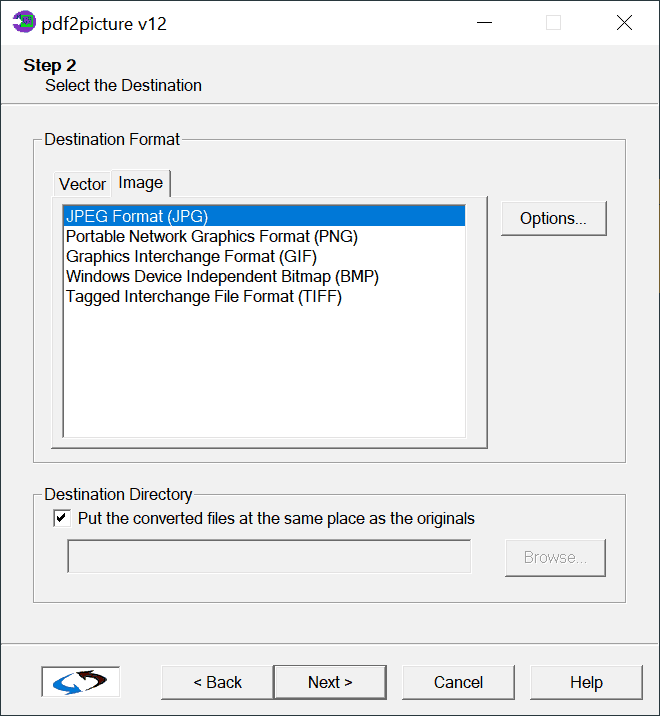
Choose vector or image mode and then select the output format. Choices when using pdf2picture are:
Vector: WMF, EMF, EPS, SVG
Bitmap: PNG, GIF, JPEG, BMP, TIFF
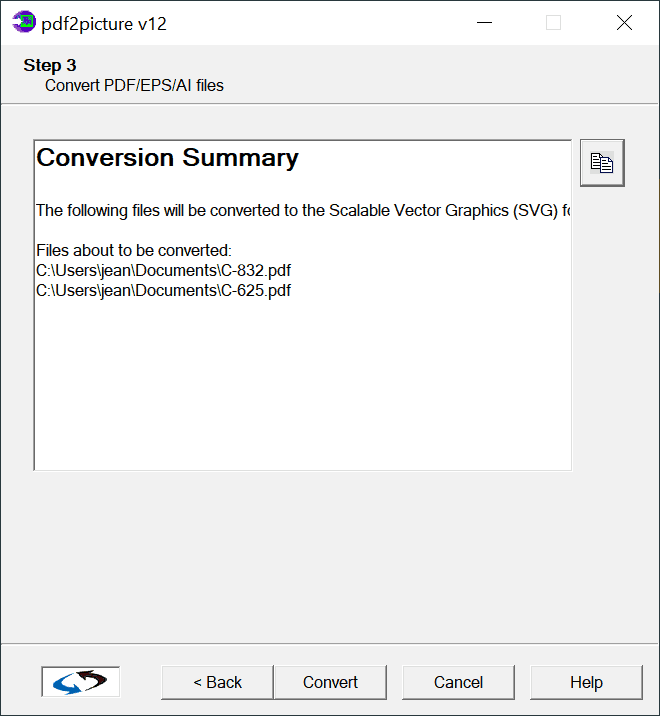
Convert the file! That’s it…
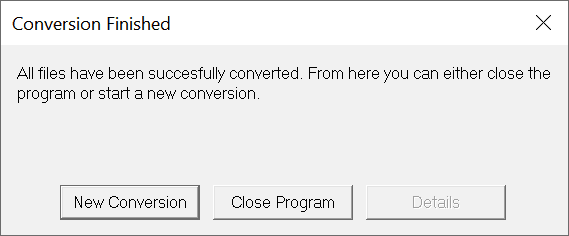
By default, the converted files appear in the same folder as the original file. You can now open them in your CAD application. At this point in the pdf2cad tutorial, you can choose New Conversion to perform more operations or Exit the application. If there are any warnings, check the Details button to review them. In almost all cases, these will be warnings about fonts that were in the original PDF file but are not on your PC, meaning that a substitute font will be used. Errors are very rare and if you encounter one, please report it to us along with the file.
Exploring the Options Menus
Select Page Settings
The Page Settings control options that apply to all files. All of the other options vary depending on whether you choose a vector or bitmap output format when using pdf2picture.
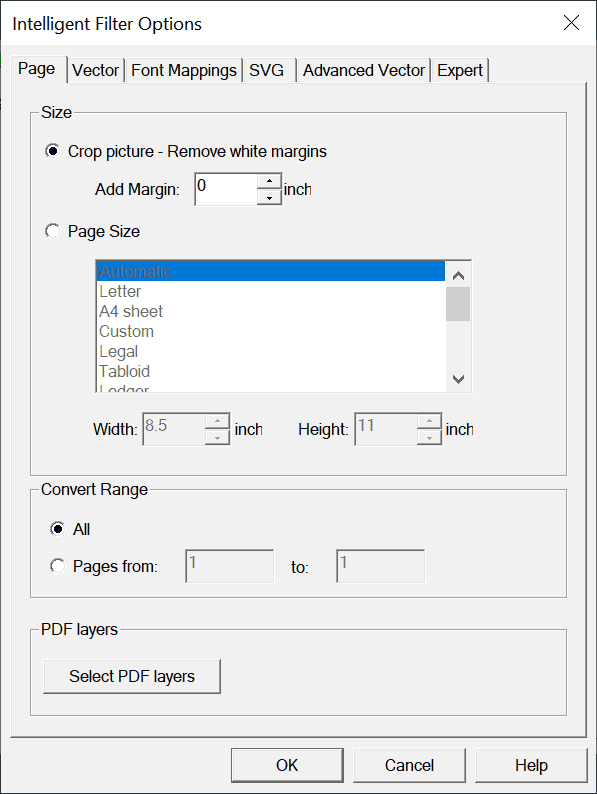
Crop Picture: Remove Margin: By default, the margins of the PDF file are used. This setting can adjust or remove white space.
Page Size: pdf2picture will automatically figure out the page size. If you want to force a standard or custom page size, select it or enter dimensions.
Convert Range: pdf2picture, by default, will convert all pages of a file. You can set a page range if you only want selected pages.
Select PDF Layers:
VECTOR MODE
General Vector Settings
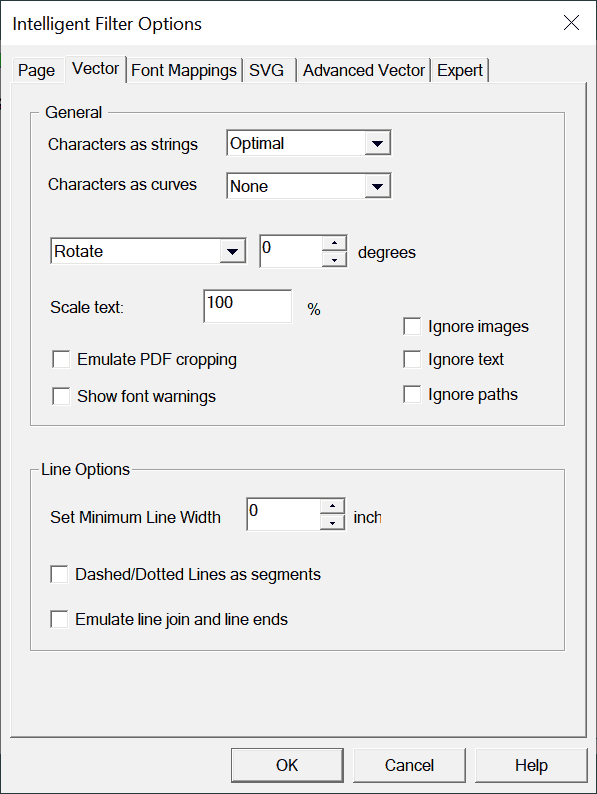
Characters as Strings looks at your file and based on placement and proximity will combine individual characters into words and words into editable lines of text.
Convert Characters to Curves will create a graphic match for the text ensuring a perfect match when fonts may be unknown or unavailable of the target system.
Rotate: You can rotate the file in either direction.
Scale Text: Enlarges or reduces the size of the text in the converted file.
Emulate PDF cropping: Several vector formats such as WMF, CGM, DXF and HPGL do not support cropping. This is the removal of unnecessary portions of the picture such as extraneous fills and other elements. Since PDF does support it, we have developed a proprietary method to simulate cropping which can be applied during conversion. Using this feature, the resulting file will look just like the original PDF.
Show Font Warning: If the same fonts defined in a PDF file are not installed on your computer, the converted drawing will not display properly. Font mapping is a way to ensure the closest match possible or to compensate for different font naming conventions on different systems.
Ignore paths, text images: Choose if you want to perform the conversion without certain elements.
Minimum line width: Defines the minimum line width for each vector object in mm. The default is 0.
Dashed and Dotted lines as segments: Recognizes dashed and dotted lines as lines with attributes. Without this feature on, a dashed line would be converted as a number of small line segments.
Emulate Line Joins and Line Ends:
Font Mappings
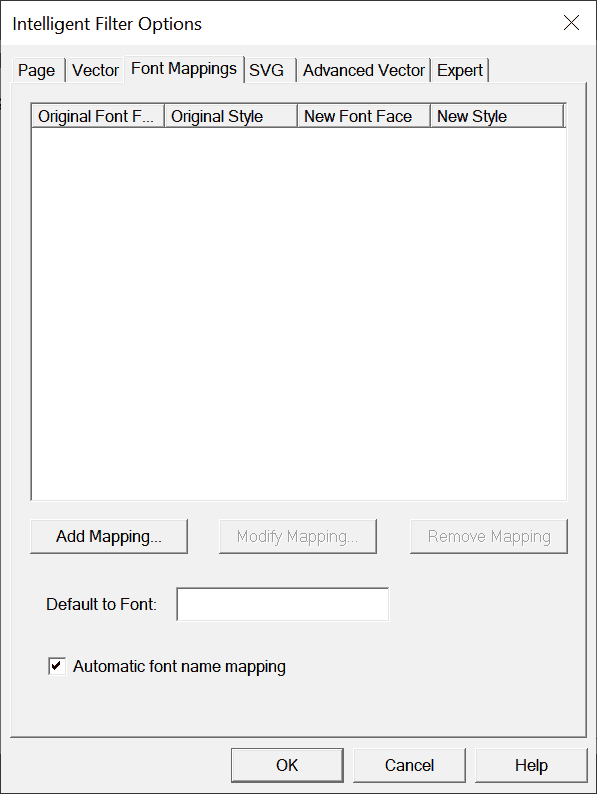
Font Mappings: If the characters are converting but not displaying properly when using pdf2picture, you likely have a font mapping issue. To comply with the licensing regulations of font suppliers, our software can not embed fonts in the vector output formats. Instead, we reference the fonts by their names. If the fonts on the target PC use the same name, the file will open and display perfectly. If the same fonts are not on the PC that opens the file, which is much more likely, the text will not display properly.
To complicate things, often, one font may go by several different names. Arial Bold, for example, may be referenced as “EHJPKB+Arial-Bold” in the original file. This font may be normal Arial Bold but the target application does not know it unless you tell it. This is known as font mapping. If the font is not mapped correctly, the closest font will be substituted. In this example, “EHJPKB_Arial-Bold” must be mapped as “Arial” with font style “Bold”.
SVG Settings
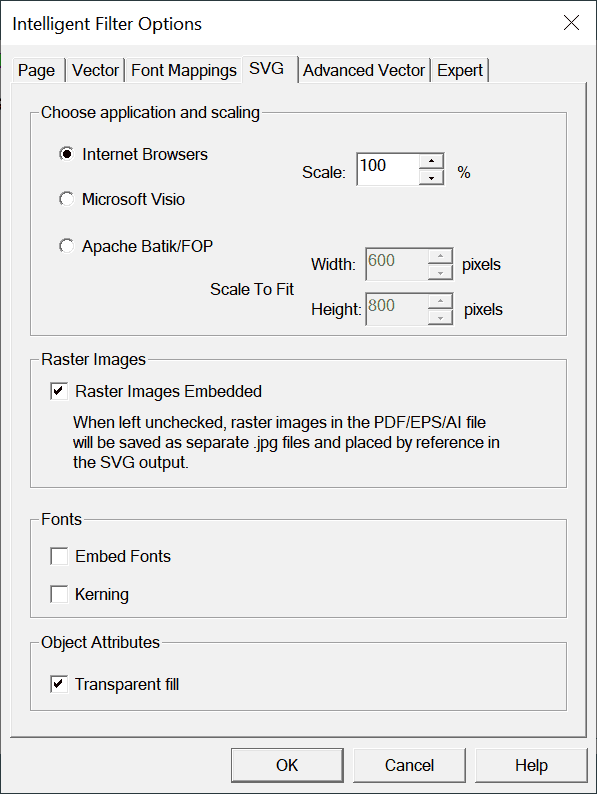
SVG Parser: Choose your SVG Parser. If you do not know, then it is probably the default Adobe SVG parser.
Scaling: Choose the size that you want the SVG files to be relative to the original.
Embed Raster Images: Normally, raster images are saved separately and are referenced by the SVG file. This option allows you to save the file with the images embedded.
Embed Fonts: In most formats, it is not possible to embed fonts because of license restrictions. It is permitted in SVG so you can always make sure you have an exact match in the file. Note this will make the file size larger so choose to do this carefully.
Kerning: If the kerning is not ideal upon conversion, you can try to select this option. If this does not produce satisfactory results, please contact us and we will work with you to optimize the kerning for your process.
Advanced Vector Settings
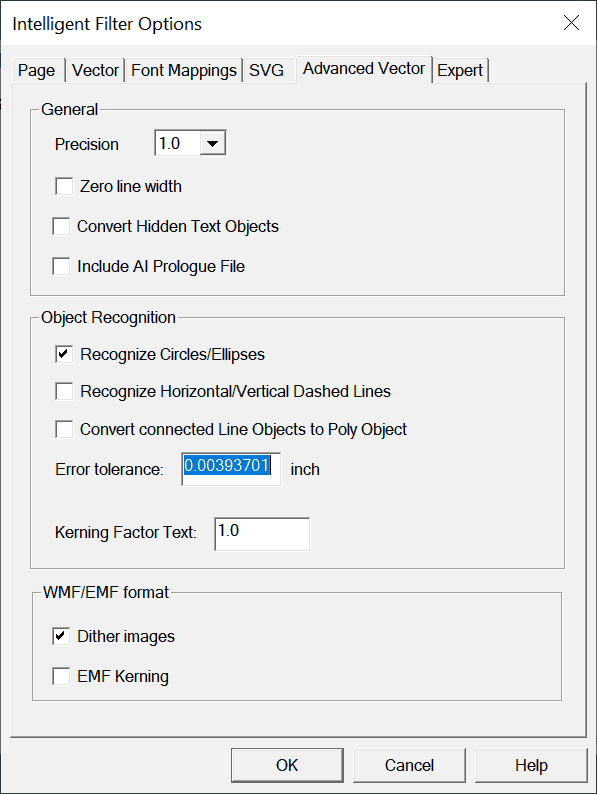
Precision Factor: Sometimes pdf2picture delivers better precision and more accurate coordinates if you change this setting from 10.0 instead of 1.0. If this does not help, please send us the file to diagnose.
Zero line width: Remove 3D effects
Convert Hidden Text Objects: Often, PDF files will contain text that is transparent or hidden under an object. This option will extract all text, including hidden text.
Include AI Prologue file:
Recognize Circles/Ellipses: The proprietary object recognition engine identifies closed polygons and circular paths and converts them to circles and ellipses.
Recognize Horizontal/Vertical Dashed Lines: Instead of being broken down into a number of smaller line segments, dashed and dotted lines can be treated as singular objects with attributes such as line type.
Error Tolerance: This is a tolerance level set for recognition of CAD objects. If one point on the closed polyline is outside of the specified range, it will remain a polyline.
WMF/EMF Dither Images: Images can be dithered to a 256 color image
EMF Kerning: This setting controls the space between letters or characters. Normally, one should not need to worry about kerning but if you do want to change the character spacing you can do it with a kerning factor. Note that a display problem with kerning may be due to a font mismatch also which could be resolved through font mapping.
Expert Vector Settings
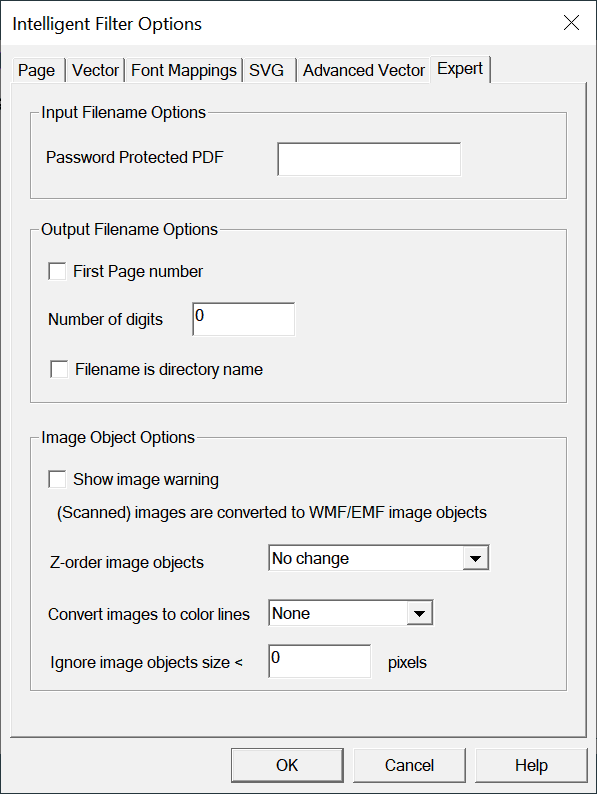
IMAGE MODE
Choose Image Settings
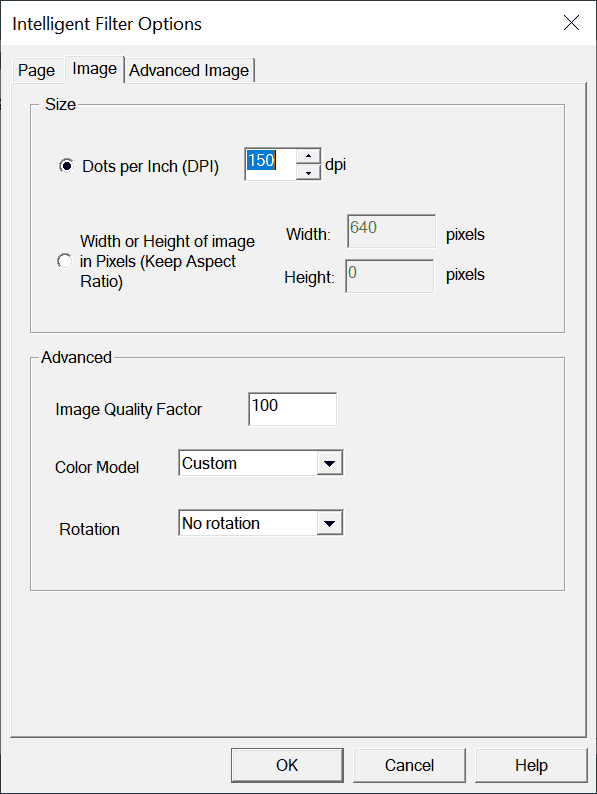
Dots per Inch: Renders the image with a defined resolution in dots per inch. Some useful settings are 600 or 1200 dpi for offset printing, 300 dpi for high-quality office printing, 150 dpi for everyday office printing, 96 or 72 dpi for Web images.
Width or Height of Image: You can force the size based on target dimensions. In order to maintain aspect ratio (scale), you must enter a number in either width or height and pdf2picture will calculate the correct dimension to ensure perfect scaling.
Image Quality Factor: 100 will give the highest quality image. Lowering this number will decrease file size which may be desirable. A few tests to see the trade-off are recommended if file size is a constraint.
Color Model: Custom or Naive
Rotation: Rotate right or rotate left during conversion.
Advanced Image Settings
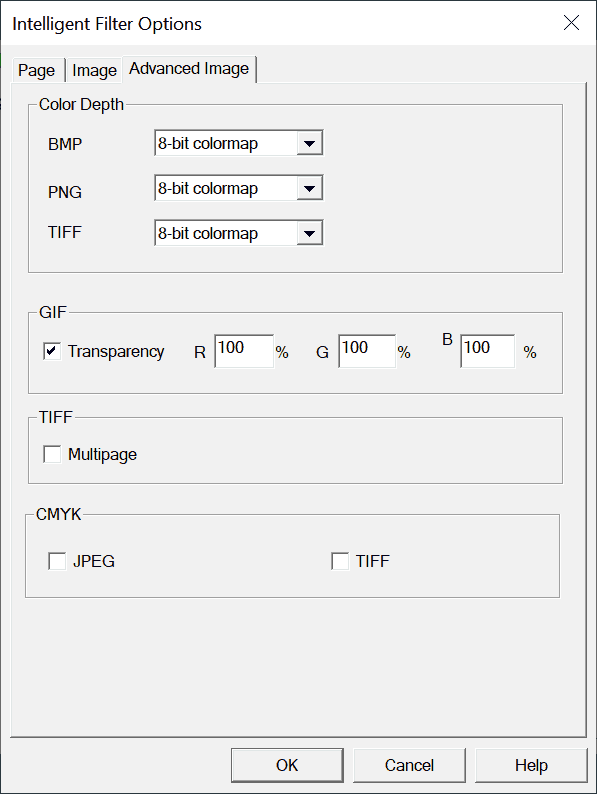
Color-Depth: Set the color depth for the image. Supports 1-bit, 8-bit and 24-bit for BMP, 8-bit and 24-bit for PNG and 1-bit b&w, 1-bit b&w FAX, 8-bit colormap and 24-bit color for TIFF.
GIF Transparency: Option to make background color (default is white) transparent for Web graphics.
Multipage TIFF: If selected, a multipage TIFF file will be created. Otherwise, a separate TIFF file is created for each page.
CMYK: If selected, a CMYK version of JPEG or TIFF files will be created.
